D-Imaging Setup
Installation Guide
Box Contents
- D-Imaging Studio
- Accessories :
-
Power cable
-
USB cable
-
Diamond holders
-
ASM-reflector-ACR-stand
-
Background-stand-dr
-
Loupe
-
Reflector-stand-dr.
- Useful Tools:
-
Allen key
-
Slotted screwdriver.
Cable Connection
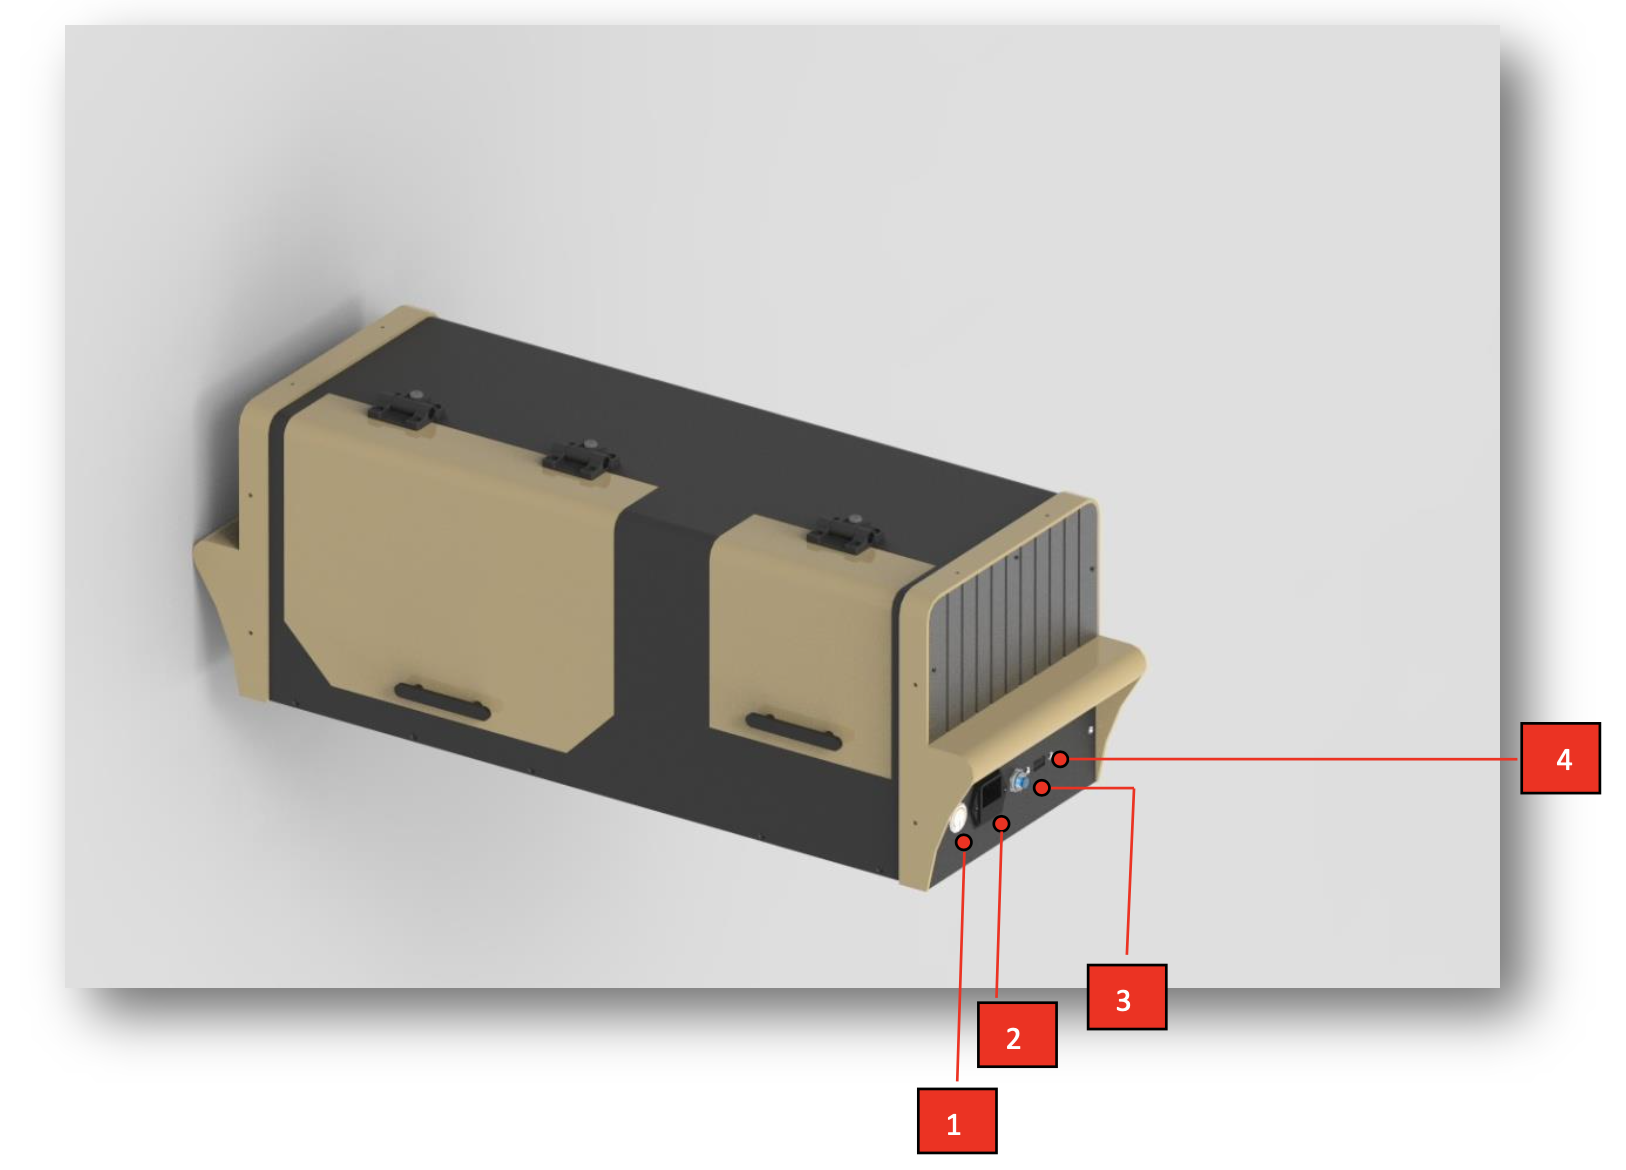
-
1. Power button On/Off
-
2. Power cable
-
3. Vaccum Pump Socket
-
4. USB Port
Start plugging the power cable (2), then connect the blue cable for the air pump and plug the grey cable for the pump power (3). Next, connect the USB cable, one end to the studio and the other to the PC USB port (4), at the last press the on/off button (1).
Camera Mount and Stone Holders
Remove the camera holder from the studio.
Fix it using a screwdriver to the camera.
Plug the camera battery and the USB cable
Place the camera into the square holder and tighten it using the left bolt.
There are several diamond holder to place your stones, depending on their shape.
Holders with hole and cut shape are good for holding diamond and stones with a flat and cut shape. Use the adapter with hole shapes for round shape stones.
Place the stone holder on the metal cradle. Use the pliers set the stone on the holder, while the vacuum is going to hold it in position.
Accessories

Included with the studio there are various accessories to get sharp photos of the diamonds.
-
1) ASM-reflector-ACR-stand : a mirrored stand to be placed near the diamond to create reflections on it.
-
2) Background-stand-dr : the stand to be placed behind the diamond to make the background.
-
3) Loupe: the tool to see if the diamonds has arrows and hearts features. Place it over the diamond and look it through the white plastic hole.
-
4) Reflector-stand-d : the stand to be placed near the diamond for not losing its edges.