ALO Photo Scan 5
All the info to get beautiful pictures
Alo Photo Scan 5.0 is a software designed to manipulate images of objects that are as big as the A4 format. The software has one interface for three main functions:
- Image acquisition from external peripheries such as digital cameras and/or scanners
- Image post-processing by applying many different digital effects such as white balance, image sharpening, brightness, contrast and other advanced effects
- Real size 1:1 image acquisition maintained by pre-coded selection masks
Alo Photo Scan 5.0 provides users with an image manipulation tool that is quick, powerful, and easy to use. The standard process of image acquisition, image post-processing and image cutting can take anywhere from 1 to 5 minutes. Instead of waiting the standard time, using Alo Photo Scan 5.0 makes it possible to get high quality images in 20-60 seconds!
Installation
Minimal Requirements
Before installing Alo Photo Scan 5.0, make sure your PC system has the following minimum system requirements:
- OS: Microsoft Windows 7 PRO, Windows 10 PRO - all home versions are deprecated
- CPU: Intel® Core i5 to up
- RAM Memory: Minimum 4GB - 8GB Recommended
- HARD DRIVE: At least 1GB of available disk space - SSD drive recommended.
- Internet connection is required for activation and updates.
- High quality full HD monitor recommended
- External Graphic Card with at least 2GB
***IMPORTANT*** This program does not run in Terminal-Server
Software Update
Alo Photo Scan 5.0 has a
Live Update system. If the Internet connection is active, when
Alo Photo Scan 5.0 starts, it connects automatically to our web site and checks to see if any updates are available. If so, it downloads and installs them automatically. The program can be updated manually by going to Support, then Live Update

Older Software Versions
Alo Photo Scan 5.0 can coexist with the previous version. To use your previous catalogs, export all the articles from Alo Photo Scan 4.0 and import again in Alo Photo Scan 5. Set again the path to the image folder in catalogue configuration.
Camera Drivers
Your Canon digital camera will not need a driver in order to work with
Alo Photo Scan 5.0. This is because our software has an internal driver provided by Canon for USB cameras. It is very important that the connected camera is properly recognized by Microsoft Windows. It is also important that the USB drivers controller are properly installed onto your system. To check it, go to the Windows Hardware Panel and make sure there are not any hardware conflicts or problems.
Note:
Alo Photo Scan 5.0 operates with Canon and Nikon digital cameras only.
First Run
Software Registration
Download from our
Download Page the software setup and follow the wizard.
When you start Alo Photo Scan 5.0 for the first time, it will run the trial version with limited features for 30 days. After this period ends, you will be prompted to register the software by inserting an activation code, on a maximum of 3 PCs.
If you already have the activation code, proceed with the software registration by following the steps below:
- Click on menu Support | Register
- Select type of License "ALO Photo Scan 5" or "ALO Photo Scan 5 + APS Move
- Enter your company name, email address and license code
- Click "Register" button
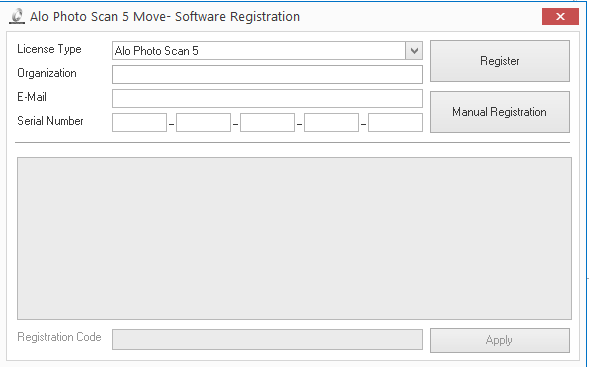
Restart the program after the registration
Catalogue Plug-In Registration
Catalogue is the Alo Photo Scan 5.0 plug-in for catalogue management. You can try this feature out during the trial period, for up to 30 days. The catalogue will print a watermark on the background until you purchase the catalogue plug in.
Note: Because this is a feature with a fee, it will require another registration.To register the catalogue plugin, click on the menu catalogue, then Register

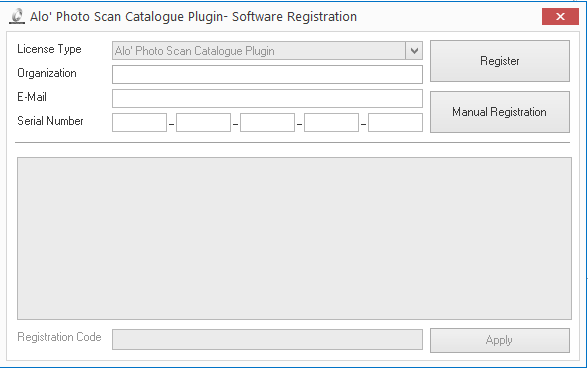
For the catalogue management (see part catalogue management).
Note: It is recomended to restart the program after registration is complete.
General Settings
To set some features of
Alo Photo Scan 5.0, push the button on the upper left
 and then select Settings
 :
:
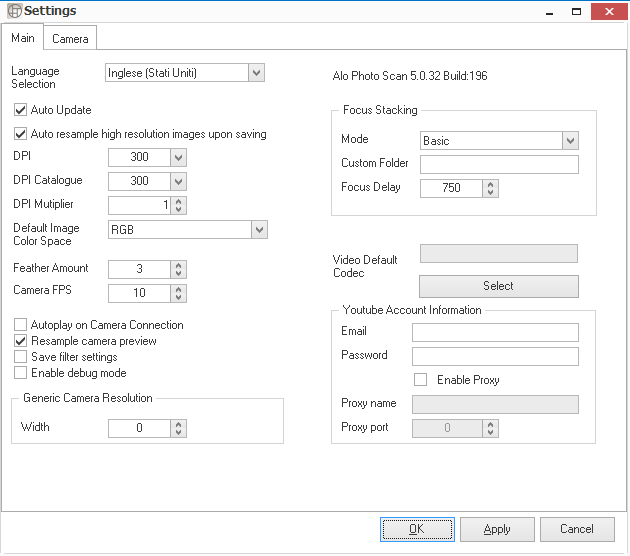
- Activate/deactivate debug mode: the debug information will be written into the file log.txt, which is inside the directory used to install Alo Photo Scan 5.0. This log file is useful for receiving technical assistance as soon as possible.
- Select the programming language
- Activate/deactivate the automatic program update at the beginning
- New resolution in DPI (“Dot Per Inch”) - Activate/deactivate sampling when you save the high resolution images
- New resolution in DPI (“Dot Per Inch”) - Activate/deactivate sampling for the catalogue
- Change the default colors space: RGB, levels of grey, YCbCr, YCbCrK or CMYK;
- Activate/deactivate the automatic visualization of the window with the image taken by the camera (if the camera is connected)
- Link Youtube account information
- Set Feather amount for selections
- Set Camera FPS
- Set Focus Stacking mode
- Select default folder for Video Codec
- Set DPI Multiplier: changing the camera distance, set the value in this field and the program automatically calculates the DPI, without manage the calibration
To put your chosen settings into effect, click on OK or Apply.
Adding/Eliminating Keys in the Quick Access Toolbar
The quick access toolbar is located in the upper left, next to the key
 . Through this you can have quick access to some functions. There are 4 keys used to save data, as well as the Undo and Redo Button. You can personalize the tool bar by adding or eliminating some keys. To add buttons to the toolbar, right click on any button and select Add to Quick Access Toolbar. To remove a button, right click on the particular button and select Remove from Quick Access Toolbar. You can also display (or hide) a button by pushing the
![]() key and selecting the button to display (or hide) from the list. Pushing the button
key and selecting the button to display (or hide) from the list. Pushing the button
![]() , allows you to display the tool-bar above or below the menu or maximize/minimize the menu. To maximize/minimize the menu, you can quickly click twice over one item of the menu.
, allows you to display the tool-bar above or below the menu or maximize/minimize the menu. To maximize/minimize the menu, you can quickly click twice over one item of the menu.
Image Acquisition and Processing
Before starting Alo’ Photo Scan 5.0, make sure to connect your camera to the PC via USB cable . Once Alo Photo Scan 5.0 is starts, the main window will be displayed:
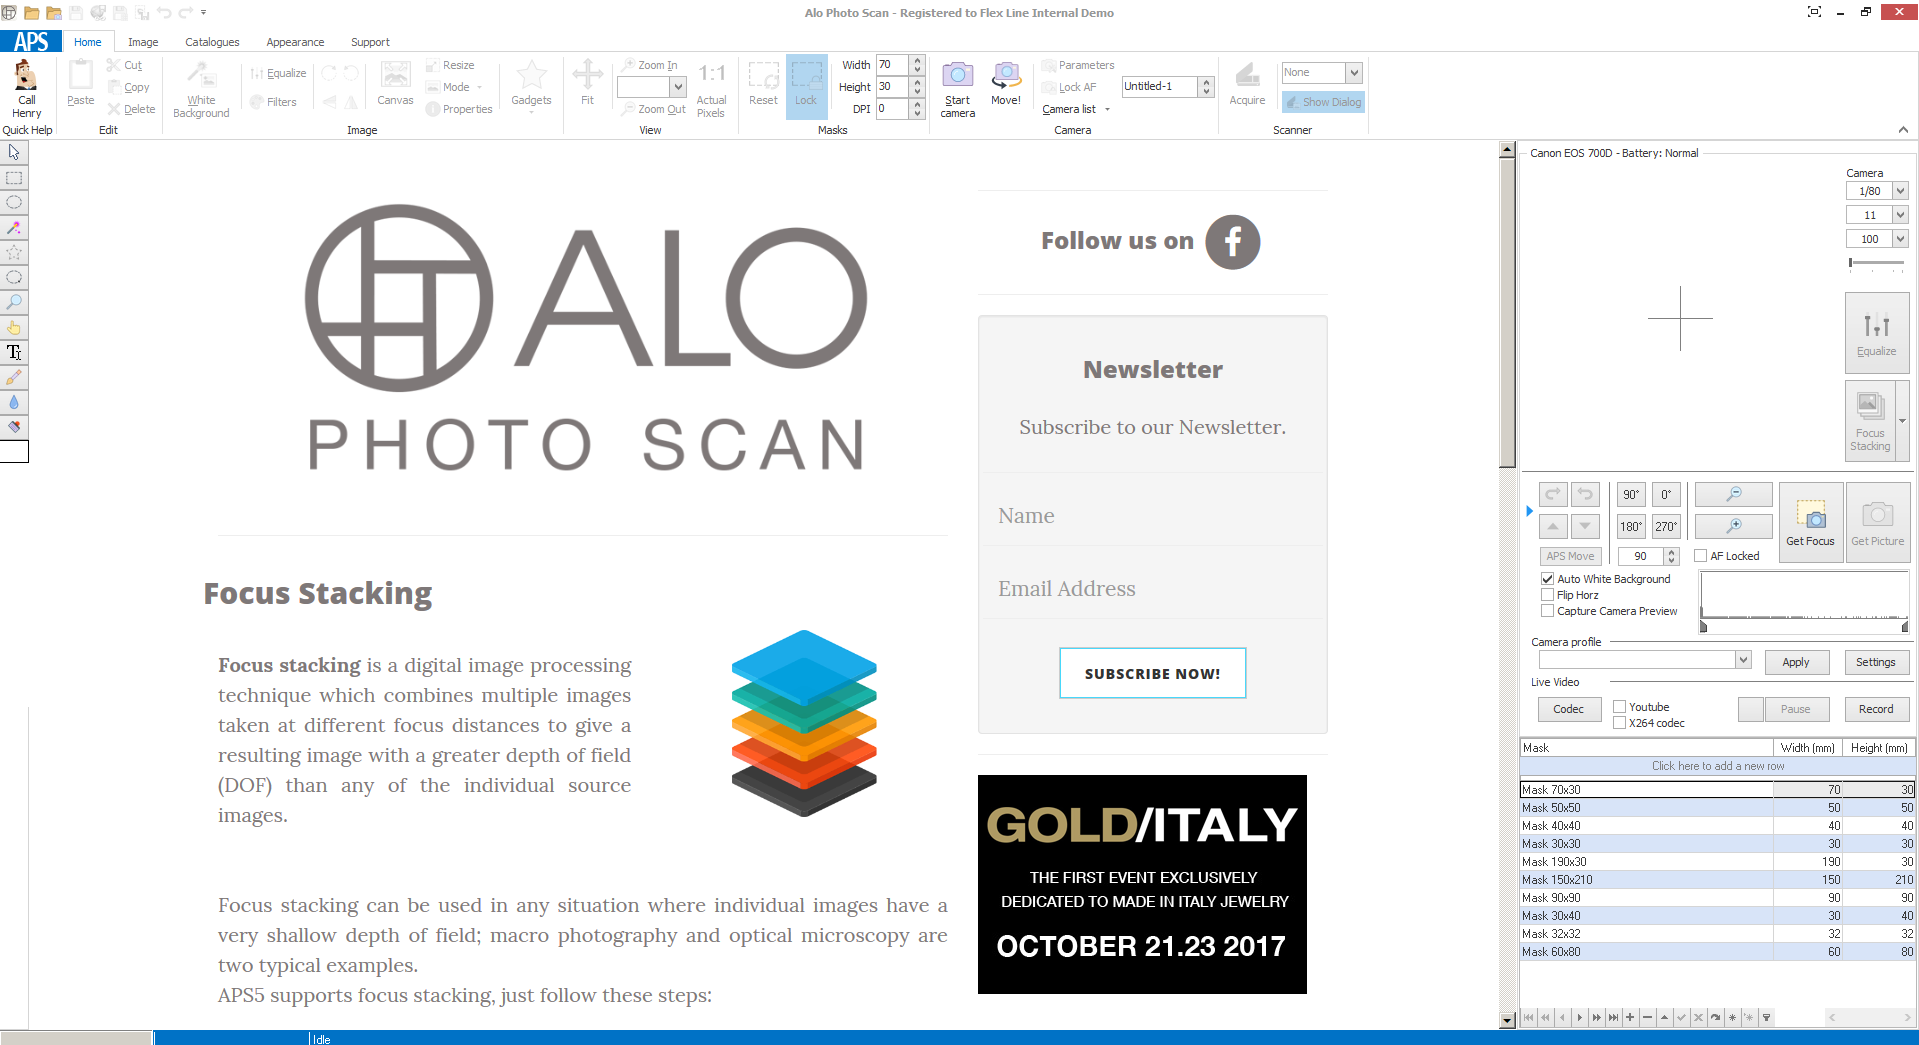
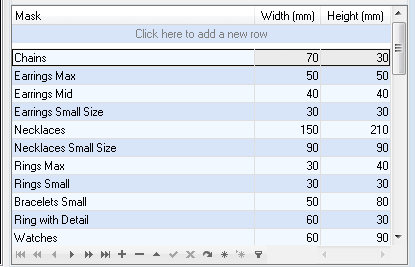
On the upper portion of the window, there is the main menu and toolbar. The main menu is used for opening and saving files. Most of the buttons located here can even be activated by right clicking on the image that you are working on. In order to work with multiple images simultaneously, you can pass from one image to the other by clicking over the file name under the main menu. On the upper right there is the selection mask window. A mask is useful for linear image cutting, which keeps the real objects dimension (1:1). Masks can be freely coded in the proper table. Providing data such as description mask, width (mm) and mask height (mm) is permitted. On the upper left hand corner there is the toolbar with the selection instruments, the image modification, zoom, and the tools needed to write texts on images. On the lower left hand corner there is the quick equalizer. This is useful for previewing equalization filters on the images before applying the changes. Below there is the status bar. This shows some information, such as the progressive percentage of saving or the value of the color scale of the image’s pixel. In the title bar of the window, there is some information about the open image, such as the kind of image (RGB, YCbCr, levels of gray, etc…).
An Innovation of Alo' Photo Scan 5.0 is the
Quick Help, which is activated by clicking the button high on the left:
![]() . It will automatically open a window below on the right, containing the various operations that can be done in the software.
. It will automatically open a window below on the right, containing the various operations that can be done in the software.
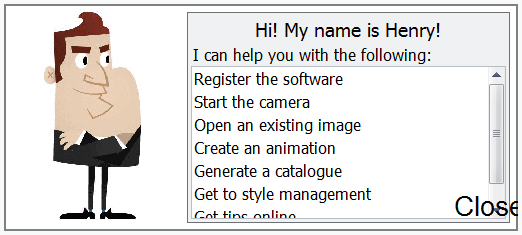
There are two ways to exit from
Alo' Photo Scan 5.0 1. Click on the key “x” high on the right in the title bar of the program; 2. Click on the key in the upper left hand corner
 then on Exit
 .
.
Note: If the modified images are not saved, the program warns you before closing.
Using Acquiring Sources
Alo' Photo Scan 5.0 allows users to get images from various sources such as :
- Scanner and standard WIA devices
- Digital cameras
- Previously saved files
Scanner or Standard WIA devices
The Scanner menu allows you to select the scanner or the standard WIA devices (ex: Webcam) from which you can take the images. Select the Scan window if you want to use the scan window owing the scanner. Otherwise if you want to receive the image directly, do not select it. Clicking on the button 'Acquire' will start the scan.

Previously Saved Files
To open a previously saved image you have two options:
- Going to the menu above on the left and clicking on
![]() .
.
- Clicking on the button in the upper left corner
 then selecting the button
Open
 .
.
New Image Creation
To create a new image, click on the button
 , then on
 .
.
In the box Name, introduce the name you will save the image with. From the box Preset, choose the predefined image dimension (“Clipboard” if you want an image from Windows © notes). In the other boxes you can set the dimensions, the units of measurement, and the resolution in DPI (“Dot Per Inch”). This procedure is very useful for inserting an image in Windows © notes.
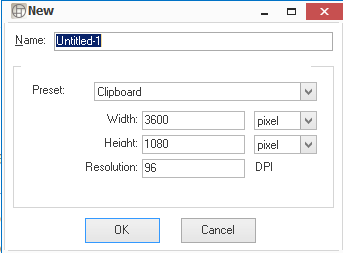
Cameras

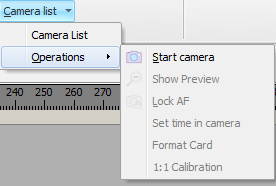
Selecting Cameras List allows you to see the list of the cameras supported. You can set some parameters of the connected camera such as stopping preview, seeing preview, locking/unlocking auto-focus, setting time, and the 1:1 calibration.
Pre-Operation
Make sure your equipments are set up properly.
- Connect the mini-USB cable to the camera and computer
- Check the camera setup:
- Set camera zoom to "AF" (Auto Focus);
- Set camera body mode to "M" (Manual) on the dial;
- Set Image quality to the first L icon
- Set Image review to OFF
- Set AF Method to FlexiZone Single (or with a square icon near)
- Disable camera auto power off
- Use AC adaptor instead of batteries
Pushing the button
 to see camera settings :
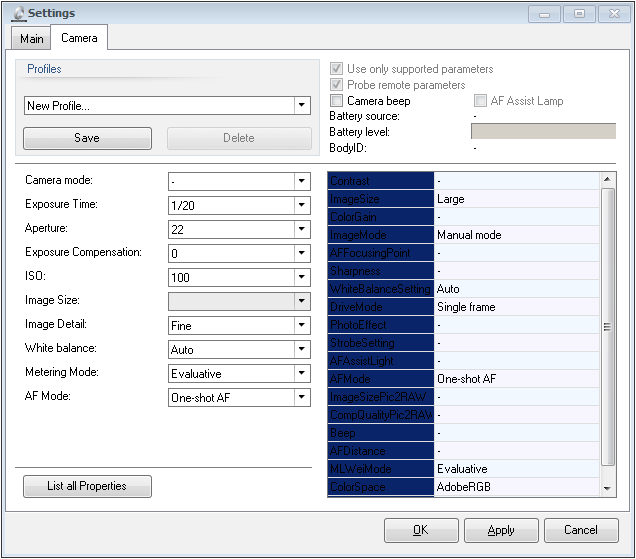
- Camera Mode: Manual, Programmed, TV, AV. For best results, use Manual
- Exposure time
- Aperture
- ISO: You have to choose according to the sensitivity of the CCD of your camera
- Exposure compensation
- Image size: from Little to Big. For best results, choose Big
- Image details: Normal, Fine, Super Fine; for best results, use Super Fine
- White balance: For best results set to Fluorescent
- Metering
- AF : Auto Focus
How to take a picture
To start the camera push on
Start Camera
 .
.
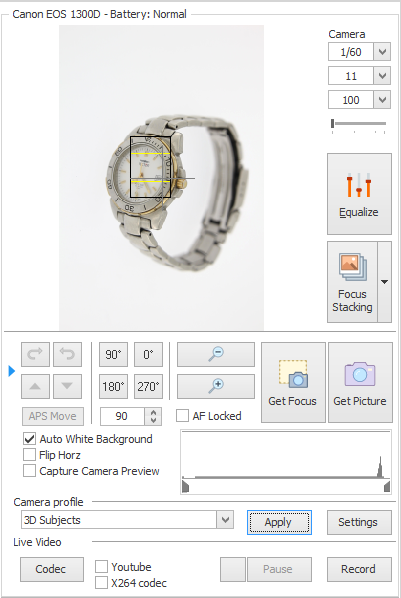
In the center of the window, the object the camera is pointing on will be visualized in real time. To acquire the image, push on
 .
.
Camera Parameters:

The three options (from top to bottom):
- Time Value (TV): This setting Indicates shutter, the length of time the digital sensor in the camera is exposed to light.
If this value increases, the overall image will be brighter; on the contrary the overall image will be dimmer. - Aperture Value (AV): Indicates the size of lens diaphragm opening; This is the amount of light that passes through the digital sensor.
If it increases, the overall image will be dimmer and the sharp will focus at the image plane (less depth of field); on the contrary, the overall image will be brighter and the sharp will focus only at a certain focal length (more depth of field). - ISO: The light sensitivity of camera. If the light sensitivity increases, it will result in more noise; if it decreases, it will result in less noise.
Some tips:
- Always try to make sure your ISO is set low in order to get the highest image quality, without adding noise to the image. Start your ISO setting at 100.
- For flat objects, try setting your AV lower (13 or even smaller).
- For more 3-dimensional objects, try setting your AV higher (18-22).
- After deciding between AV and ISO, TV comes last. At this point, you will see the overall brightness in the preview. Modifying TV will allow you to brighten or dim the image. Make sure your TV is set no larger than 1 / 60, or it may blur the image. If you find that the image is still too dim at this setting, then you can modify the AV or ISO. You can also adjust the zoom
Here are some brief regulations:
- Flat objects (smaller depth of field): TV = 1/125, AV = 11, ISO = 100
- 3D objects (greater depth of field): TV = 1/ 30, AV = 22, ISO = 100
The image can be modified in real time. Here is a list of the available functions:
Focus:
- Cross point : Indicates the centre.
Placing products in the centre gives the image better focus and sharpness.
- Rectangle : Means the focus point.
Click and drag to change the focus area.
- Click on Get Focus
 to focus the object in the preview
The software will let you know if the object is focused or not.
Preview Functions:

- Auto White Background If active, this automatically makes the background white after the shot.
- Flip Horiz: Reflects the image horizontally in the preview
- Capture Camera Preview: Captures the preview as an image.
- AF Locked : If this is activated, it locks the auto-focus function of the camera. This permits the manual-focus and moving of the camera
Rotations:

This virtually rotates the preview by setting a value between 0° and 360° or doing directly 0°, 90°, 180°, or 270° pushing one of 4 buttons
Equalize:

Open the Equalization windows to modify the image as soon as you shoot it
Recording a Video:

Pushing the button Codec allows you to set the video compression codec (DivX, Xvid, ffds, etc…) and the compression parameters. Pushing Record, starts recording. You can pause it by pushing Pause, make it start again by pushing Restart and stop it by pushing Stop. As soon as the video is recorded, the directory containing it will open (the name of the video will be the current date and time) and then the video will be sent to the multimedia reader to be reproduced.
Focus Stacking
Clicking on
Focus Stacking button
 and selecting some parts of the jewel in the preview, the software is able to focus the multiple selected parts in the picture.
Clicking the drop down arrow in Focus Stacking displays two options:
- Clear Last : clears the last point added;
- Clear All : clears all the points added;
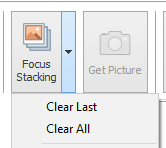
After selecting the points in the object, click on
Get Picture button
 . This allows the camera to take a photo, while focusing at every selected point from the image preview:
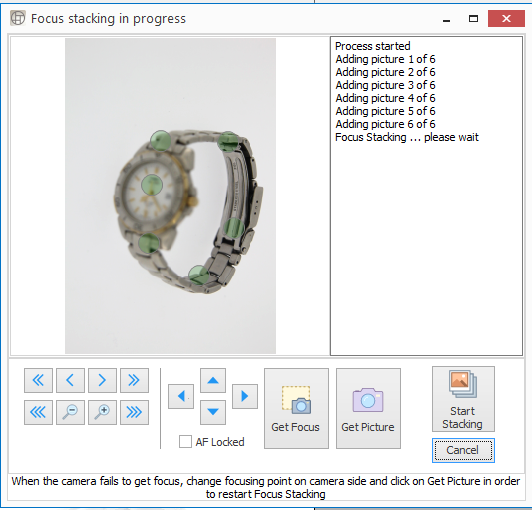
The software combines each photo taken and shows the final image.
Mask Selection

To select a predefined mask in the image, double click on the chosen one inside the lists (clicking on the column’s title, you can order the list alphabetically) :
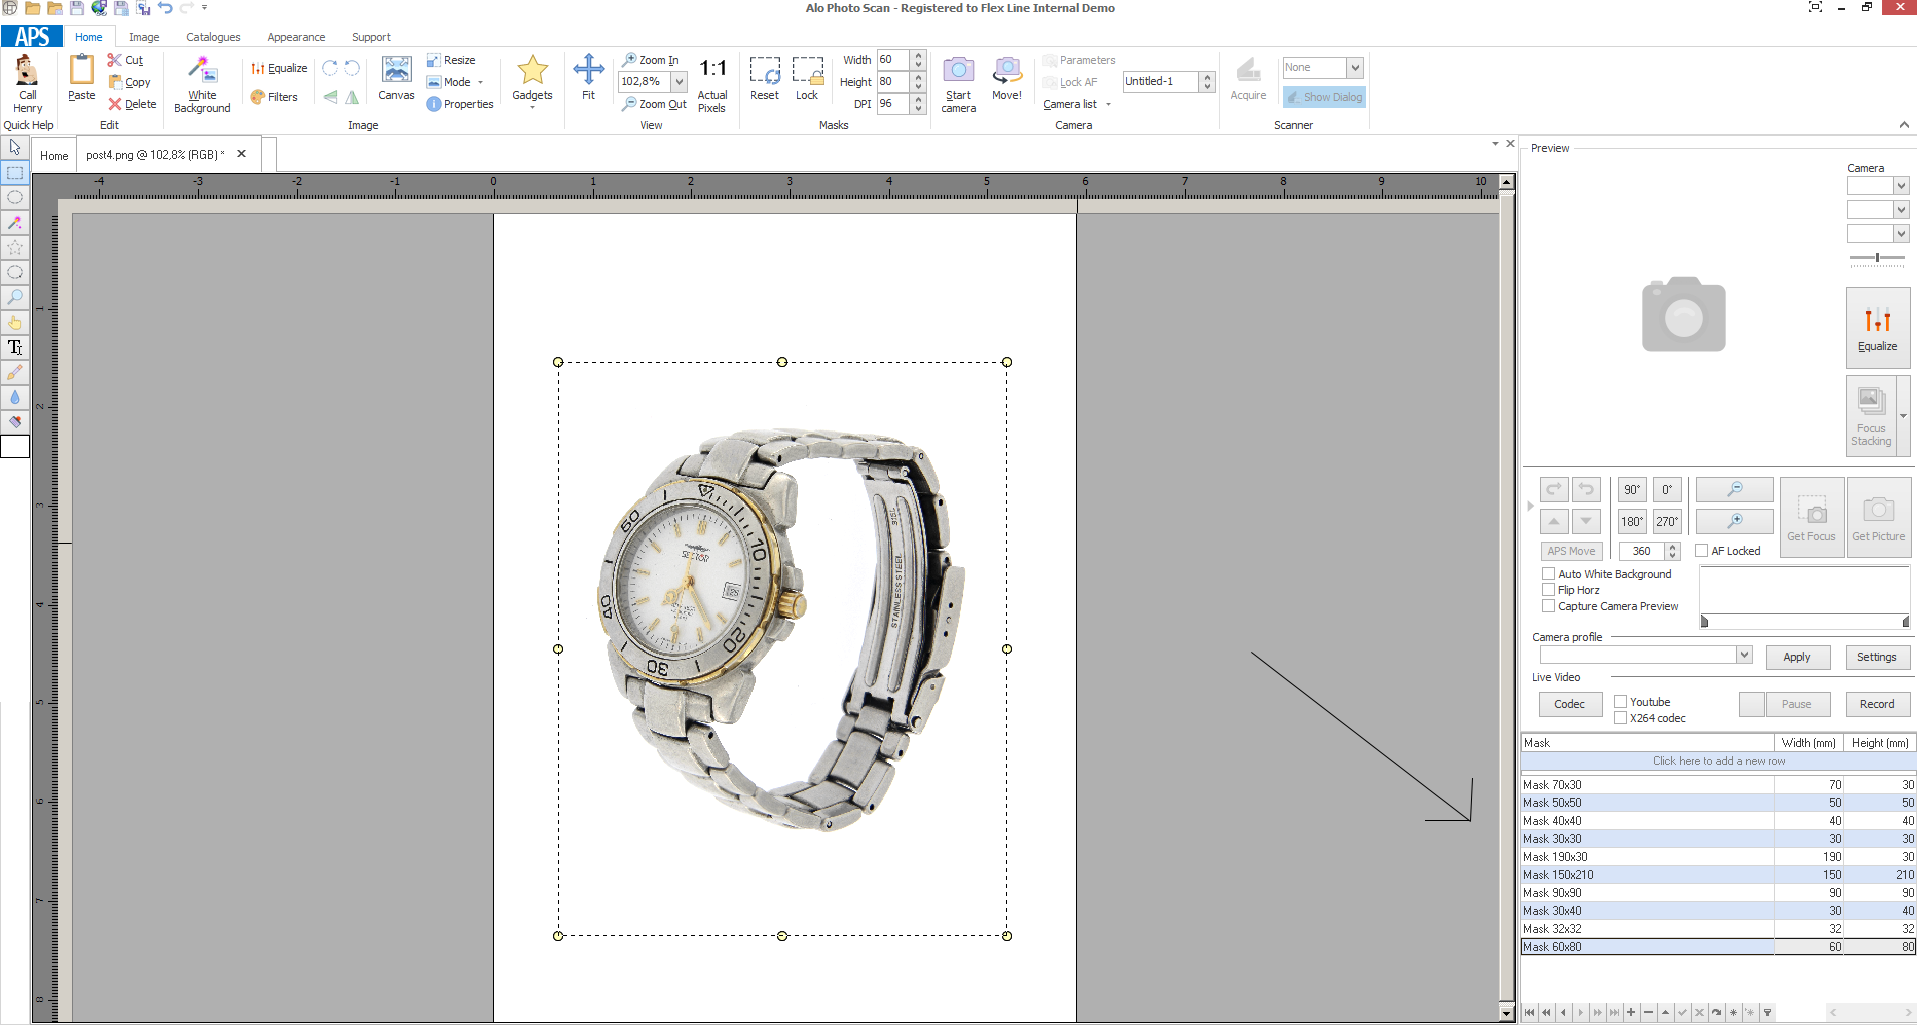
The new mask will be visualized in the upper left corner and will be moved by keeping the mouse pushed while dragging the selection to the chosen point. To crop the selection, right click on the mouse and "crop selection" (or push Ctrl + R).
Note: The varied masks will not be saved on the catalogue module.
Pushing
Lock
 you activate or deactivate the little yellow squares at the sides of the selection.
To deactivate the selection, push the right key of the mouse on the selection an click on Deselect
 .
.
Below the area in which you can change the dimensions you can also change the image resolution, in DPI, inside the selected area.
The selection masks can be modified, added, deleted, through the following toolbar :
- Sliding between the masks :
- Add/modify/delete the masks : 
- Create/search bookmarks : 
- Filter: 
Equalization
Among the available effects, Alo’ Photo Scan 5.0 gives users an option for getting their desired results efficiently. Below an operative sequence that is often very effective.
White balance: By selecting Home, Image, then pushing on White background
 The usual grey background is converted to an all white background.
The
EQUALIZER allows you to improve the image further. After you have chosen and applied the mask, go to Menu, Home, and select Image. Push on
Equalize

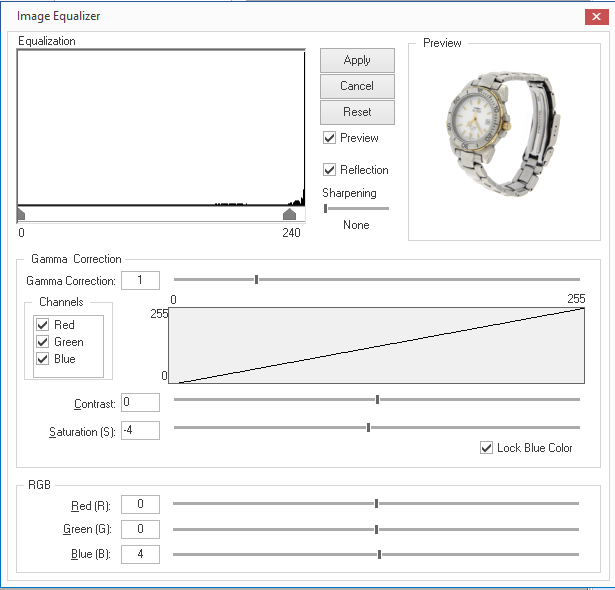
Acting in the Histogram, you can equalize the dark and light tones:
Moving the left cursor from 0-255, will allow the dark tone to be adjusted;
Moving the cursor from 255-0 allows the light tone to be adjusted. Generally, it should be moved after the highest peak of the darker selection, in order to get the an absolutely white color, while removing background noise.
- Sharpening : This is used to sharpen to details of an object. This can be used for images with small metal makings or stone cuts. If the presence of metal is predominant it is recommended to choose Medium.
- Gamma Correction : This adjusts the mid-tones of the image, darkens in negative and lightens in positive.
- Contrast : In negative, it determines the "clearness".
- Color Shift : changes the metal color .
- Luminosity : changes the picture luminosity.
- Saturation (S) : This allows you to regulate the intensity of gray objects (silver, white gold, ecc..) To get a natural color, it is recommended that you use
Blue (B) in positive. If the Flag
 is active, the window blocks the Blue bar. It also automatically sets the right value according to the one selected in Saturation.
To apply changes, push Apply. To come back to the original setting, select Reset, or Undo
 .
.
Post Processing Tools
Once the image is acquired, it’s shown in a new window inside the main area, next to the mask selection and the toolbar.

The palette includes some tools for selecting portions of the image:
- Rectangular Selection
 : This allows you to select rectangular portions of the image. This can be done by left clicking and then right clicking to set the dimensions of the rectangle.
- Circular Selection
 : This selects circular or elliptical areas.
- Magic Wand
 : This allows you to select areas with similar colors. You can set a tolerance by changing its value. Just click on the image and the tool will select all similar pixels depending on the tolerance.
- Multi-point Polygonal Selection
 : This feature allows you to select a polygonal pattern. Just one-click in some points and the tool will select the area within them. To close the selection click twice on the last point of the polygon;
- Free Hand Selection
 : This allows you to select areas of every pattern. Just click and hold on the left button, then drag the area that you want to select;
- Zoom In and Out
 : This allows you to zoom in and out of the image. This is useful when selecting a particularly small region of the image. You can also use the zoom by selecting Home, then Views, and pushing on the
 icon. The image will be resized to fit the window. Pushing
 or
or
 enlarges and reduces the photo by 10%. The zoom factor can be set manually, introducing it or selecting it in the drop-down text box and pushing Enter. Clicking the button
 , the software shows the image in its real pixel dimension (100%).
- Hand
 : Allows you to scroll the image;
- Text
 : This allows you to place text over image; (see part
7 - Text over the image)
- Color
 :
:

- Smudge
 :
:
- Radius: brush size
- Opacity: the brush stroke opacity, lighter or darker
- Feather: brush stroke shade, more or less intense
- Amount: color quantity

- Clone Stamp
 : to clone a part in the image or remove imperfections just click on the point to be duplicated and then click on the part to be covered.

When you select a part of an image, you can move it going ito the selected area and keepin pushed the mouse’s button.

You can also
 (or push Ctrl+C),
 (or push Ctrl+X) or select
 (or push “Del”) and go straight to the main menu to
 a new image.
To select the entire image, go to the menu, press image, and select
 .
.
To select the inverted area, go to the menu, image, then select
 .
.
To select the selected part, go to the menu Image | Crop Selection
 . If the selected area is not rectangular, the cutting is performed following the smallest rectangle enclosing the selected area.
To cut a selected area, while leaving the chosen background, click on Image and select New Layer
 .
.
The new layer can selected by the mouse and dragged to the desired position. The layer can also be resized dragging the little squares at the sides or at the corner of the selection. Once positioned and resized, the layer can be inserted in the image by selecting image, then
 .
.
To deselect a previously selected area, go to Image, then Deselect
 .
.
Note 1: Most of the parts from the previous operations can be performed with a right click on any point of the image too.
Undoing the Executed Operation and Redoing with Undo and Redo
You can undo an operation done executed on an image pushing once or more
Undo
 high on the left. Instead to redo your last operations, undone with Undo, push once or more on
Redo
 .
.
Filters
If you are not satisfied with the results, click on the
filters button
 to use a set of digital effects to apply in order to improve the image. On the left, the window will display the original image and on the right window will display the image with the filtration.
Clicking on
 allows you to modify the image.
Selecting the Control Box Lock Preview allows you to view the previewed image on the right side of the screen. You will not have to select preview manually when you check Lock Preview.
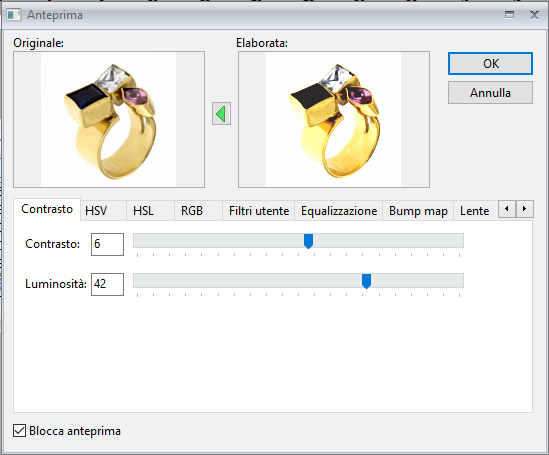 | Contrast : Move the cursors to change contrast and brightness values. |
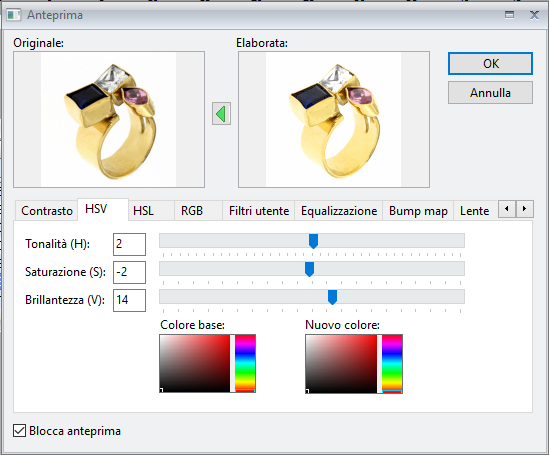 | HSV : Move the cursors to change Hue(H), Saturation(S) and Brightness(V) values. |
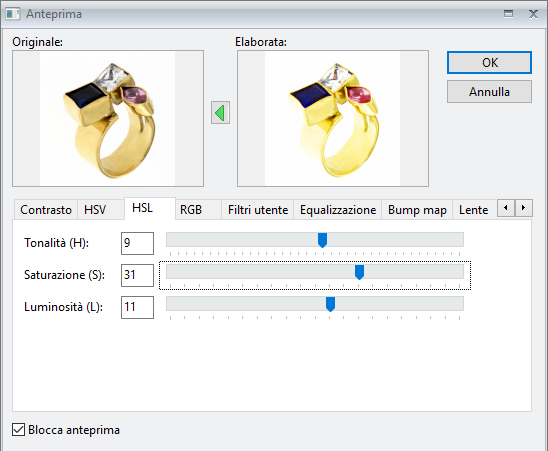 | HSL : Move the cursors to change Hue(H), Saturation(S) and Lightness(L) values. It is very useful with steel objects. |
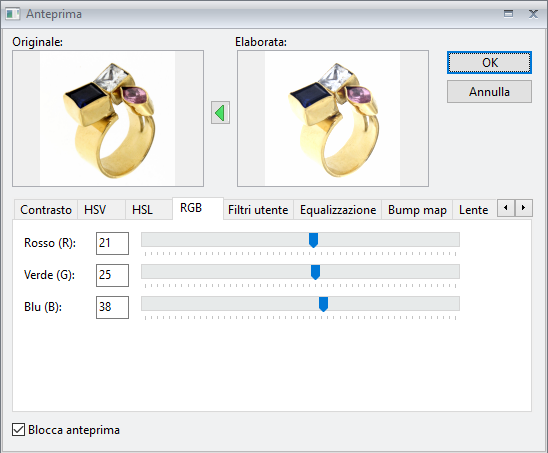 | RGB : Change values for the primary colors: Red(R), Green(G) and Blue(B). |
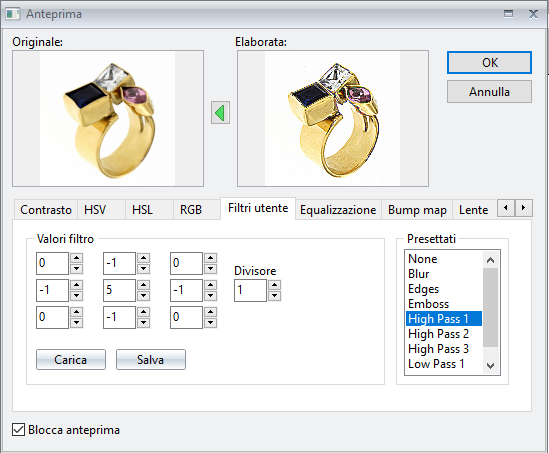 | User Filters : Changing the values in the matrix you can obtain various effects. You can use some of the presets in the list: Blur, Edges, Emboss, High Pass 1, High Pass, 2, High Pass 3, Low Pass and Low Pass 2. You can save or charge a particular filter value configuration through the buttons Save and Charge. |
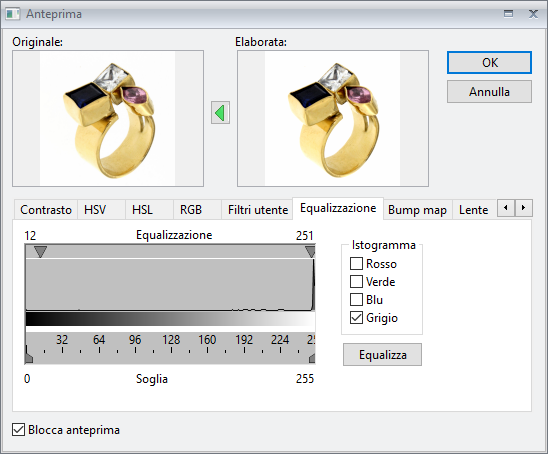 | Equalization : Changing the histogram cursors you can equalize light and dark tones. |
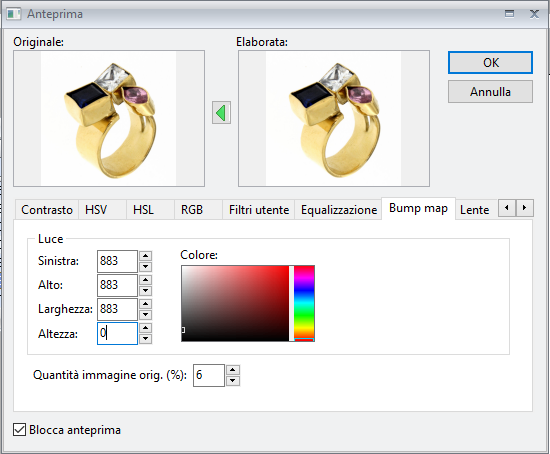 | Bump Map : This applies a suffused light, of the selected color, in the indicated position. It is used to simulate holes, protrusions and roughness. |
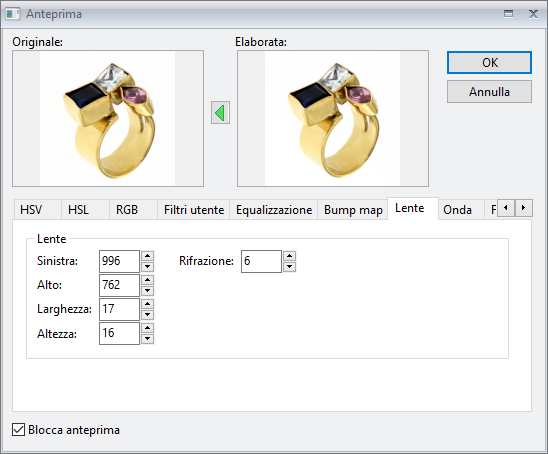 | Lens : It applies a lens effect on the picture. You can change width, position and refraction factor. |
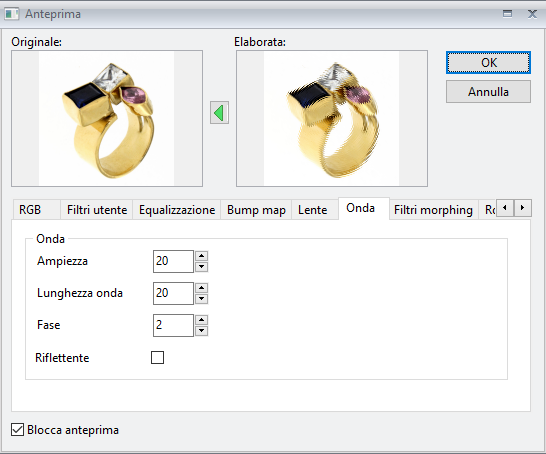 | Wave : It applies a wave effect on the picture. This filter lets you change its amplitude, length and phase values. |
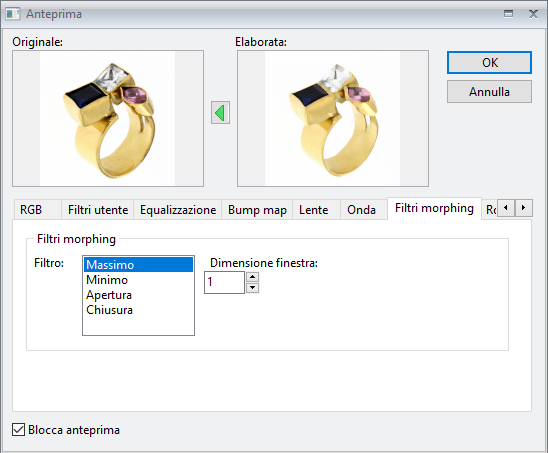 | Morphing Filter : There are the following filters: Maximum, Minimum, Open e Close. It is possible to set the morphing window dimension. |
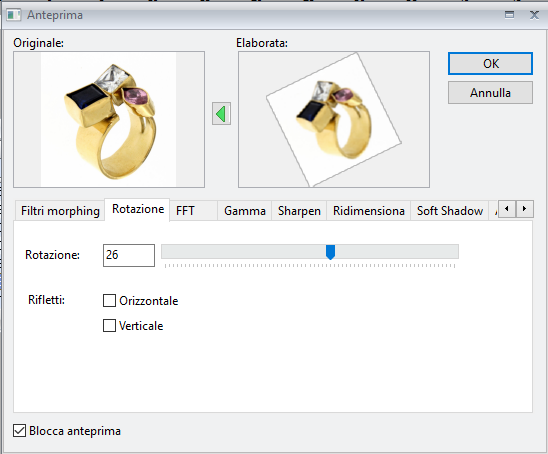 | Rotation : It permits you to rotate the canvas image. (not only 90°). |
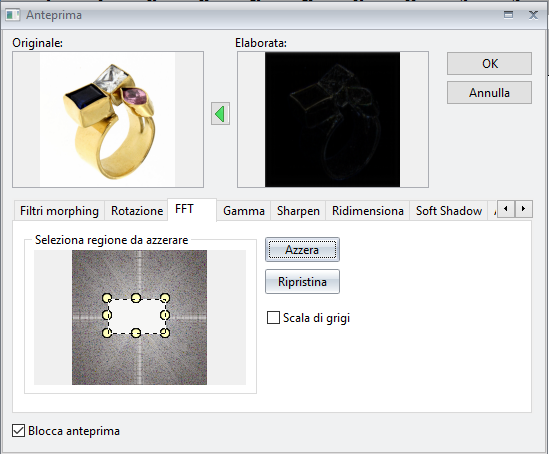 | FFT : It allows you to apply a quick Fourier transformation to decompose an image in its sine and cosine. The elaborated image represents the image in the domain of the frequency (or of Fourier). Instead the input image is the equivalent one in the spatial. For more information go to the following
address .
|
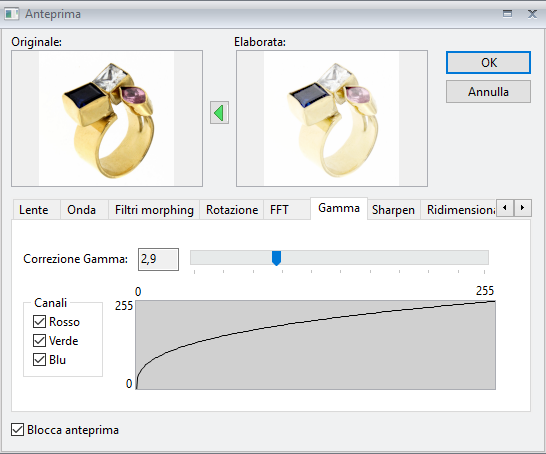 | Gamma Correction : It permits you to modify the colour gamma of the colours of the image, as previously seen. |
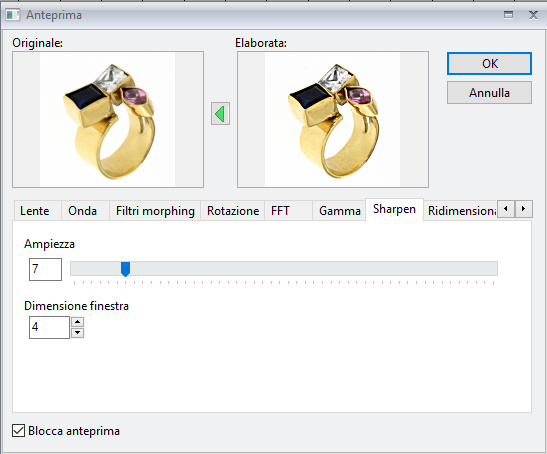 | Sharpen : It is used to improve the image contours. Acting on the bar you can increase or reduce the effect and the dimension of the application window. |
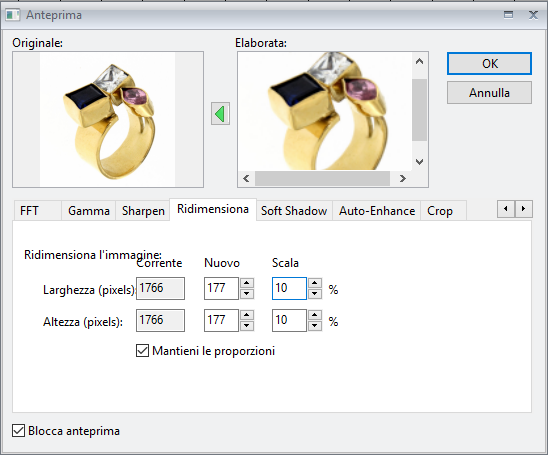 | Resize : It allows you to change the pixel size and / or scale percentage of the image |
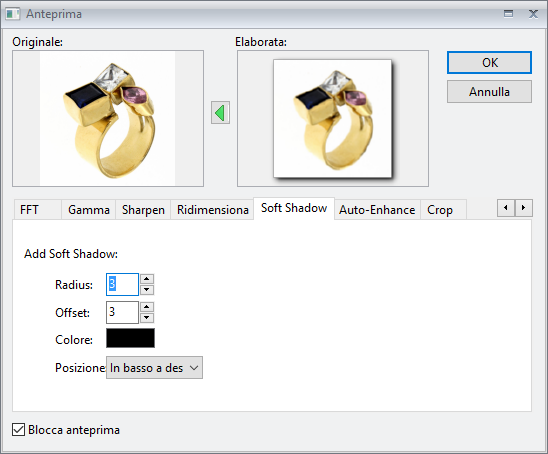 | Soft Shadow : It is allowing you to create shadows around the image, depending on the position chosen. |
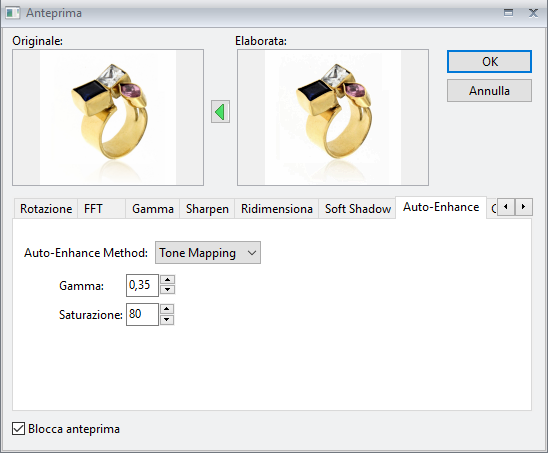 | Auto-Enhance : It improves the images. |
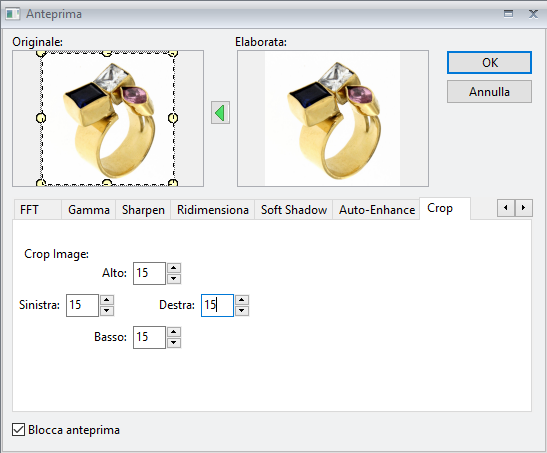 | Crop : It crops the image, setting the measures for the four sides |
Transparency and Blending Management
Transparency
The transparency can be applied from the menu by selecting image, then Transparency.(See Figure):

With this function you can remove the background completely. You can set the clor, which has to become transparent (white is the default one). from the palette clicking on “…”, or from the drop-down menu. You can also set the color tolerance (the default value is 15 %).
By clicking
 the transparency is applied to the selected area (if you have not selected any area, the transparency is applied to the whole image)
To remove transparency, click on
Undo
 in the quick access toolbar.
In the example below, the transparency is applied only in the selected part of the image :
| BEFORE : | AFTER : |
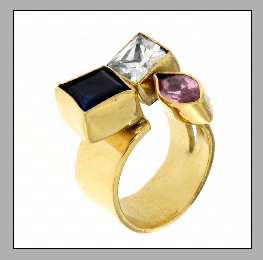 | 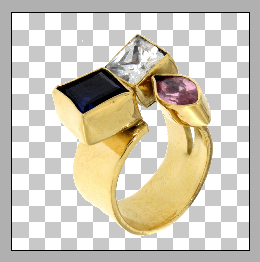 |
To keep the file transparent while you are saving to file, it’s necessary to use GIF, PNG or TGA extension to support it. Otherwise transparency will be replaced with background color (white is the default one).
Blending
To set opacity go to Menu, Image, then select Blending and set the blending percentage :

To remove it, reset the percentage to 0 %.
Shadow
With Alo’ Photo Scan 5.0 you can apply shadows to images. Go to the menu, image, then select shadow.(see figure):

Shadows are applied with the following settings:
- Radius: shadow depth (default 17).
- Horizontal: shadow horizontal orientation (default 5).
- Vertical: shadow vertical orientation (default 30).
- Color: shadow color.
- Intensity : shadow intensity.
To apply the shadow click
Apply
Example:
| BEFORE : | AFTER : |
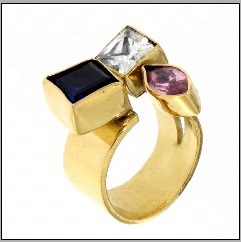 | 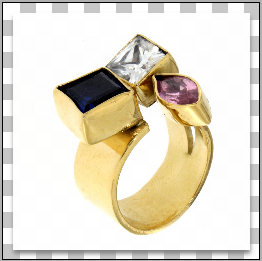 |
Text Over the Image
To put
text over image, click
![]() in the toolbar. Then select the area where you want to insert the text. In the menu below, the following strip to modify text will be visualized :
in the toolbar. Then select the area where you want to insert the text. In the menu below, the following strip to modify text will be visualized :

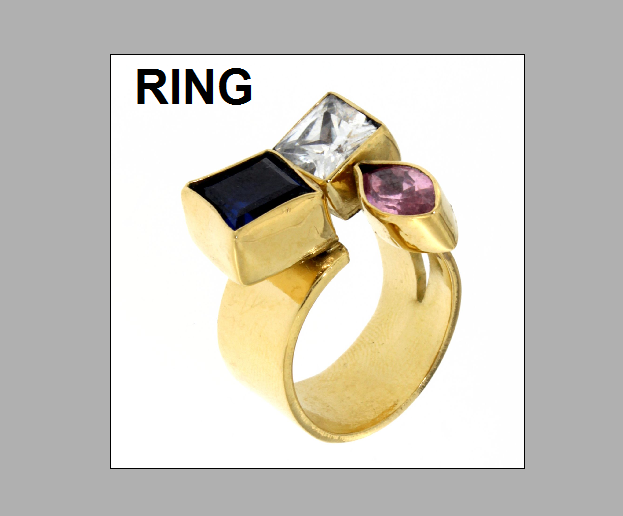
Set text font type, dimension, alignment and color.
You can also resize or move the text area by clicking on
 .
.
Pushing
 you can
apply the modification, in the meantime pushing
 you can
cancel the operation before applying the text over the image definitively.
To
remove the text once applied click on
Undo
 high on the left.
Change Background Color
For changing the image Background Color of the image:
- Select Magic Wand Button
 in the tools toolbar and click in any point within the white background
- Right click and select
Feather Selection

- Choose the color from the tools toolbar
 and click OK button
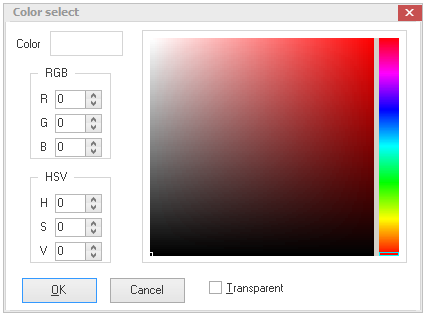 .
.
- Push Delete on the keyboard or right click and press
Delete
 .
.
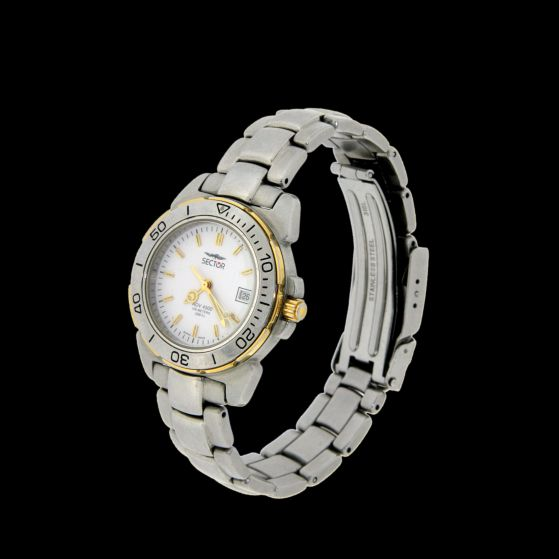
Original Image:
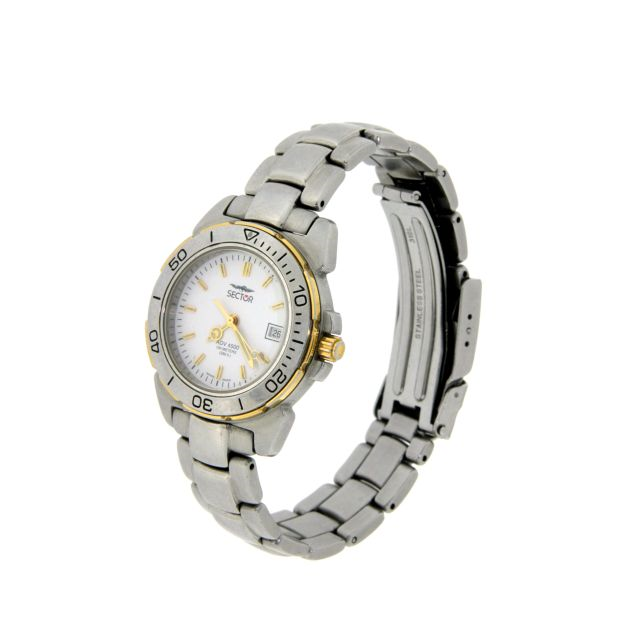
Image with different background color:
Resizing, Rotation, Reflexion
Resizing:
Resizing an image means to save space on disk.
Go on Menu, Home, then Image and click on
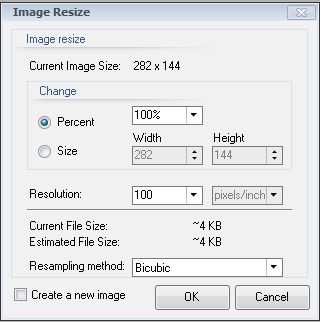
Image Resize
![]() .
.
Choose your desired percentage of the resized image by writing it or selecting it from the list. The software will show you the new dimensions. Instead of indicating one of the dimension, you will see the resizing percentage and the occupied space. Along with this, you can chose a different way of sampling or creating a completely new image, without modifying an existing one.
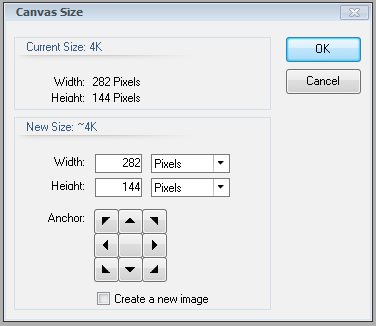
You can modify the canvas’ dimensions going to menu, Home, then selecting Images. Click on
Canvas
![]() .
.
If you would like to add new canvas’ dimensions, select the unit of measurement, then click on the arrows to insert the image in a bigger or smaller canvas. You can also create a completely new canvas.
Rotation:
To
rotate your image of 90° clockwise or counter clockwise, go to menu, Home, then select Image. click on:
 .
.
Reflection:
To apply a vertical or horizontal
reflection on your image, go to menu, Home, then select Image and click on:
 .
.
Gadgets
Clicking on menu, home, the
 This is useful for looking at other functions.
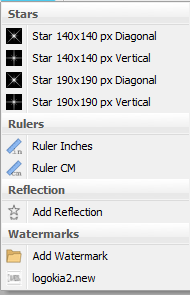
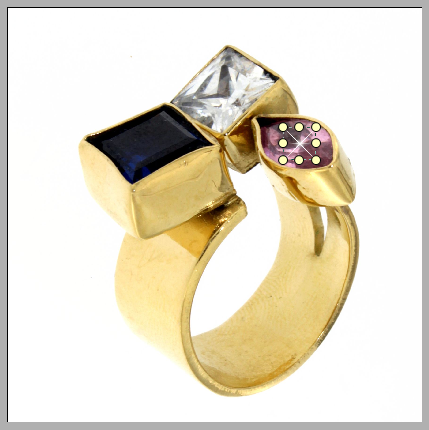
Stars :
Rulers : (Inches or CM)
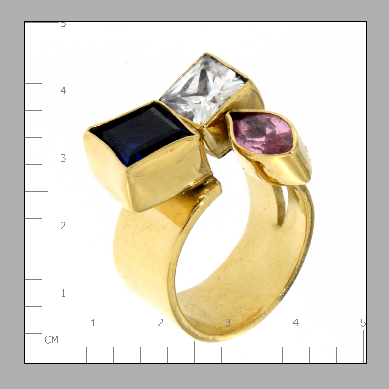
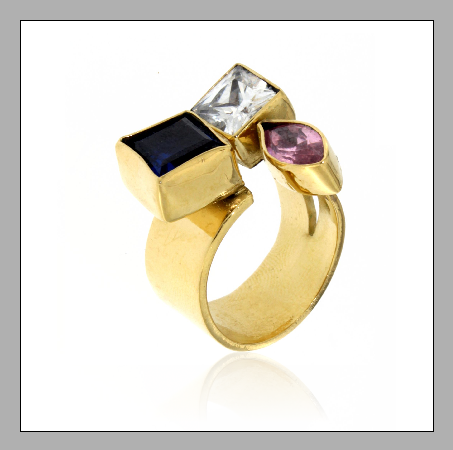
Reflection :
To add the reflection, click on Gadgets, then Add Reflection. The program automatically creates a reflection over the object, based on the space present in the background. Otherwise do a rectangular selection on more than half of the object and click Add reflection.
Saving Images
After applying the changes you may now do the following:
1. Save the whole image:
- Clicking on
 in the upper left hand corner.
- In the upper left hand corner, select
 and then click on
Save
 (this way the image is saved with its original name)
- Clicking in the upper left hand corner and then click on
Save As
 (this way the image can be saved with a name chosen by the user)
2. Save Your Image for the Web:
- Select
 in the upper left hand corner of the screen.;
- In the upper left hand corner, select
 . Click on
Save for Web, so you can save the image with predefined dimensions for the web
 :
:
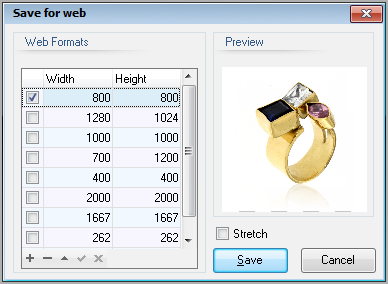
The file is saved with the name used to save the dimensions of the image. You can select more formats through the control box:
 Through this control box, you can add/delete and modify the image. This way, you can save the images with the selected dimensions.
If you select Stretch, the image will be resized. If you don’t select it, the image will be cut;
3. Save Image for the Catalogue:
- Select
 in the upper left hand corner.
- Click
 in the upper left and then select
Save as New Model.
 You can save the image and introduce it in the catalogue (see part
1 - Models).
- If you select a part of the image, with every kind of selection, clicking on
 high on the left;
It is recommended that you save the image in Jpeg (.jpg), even if other formats are supported. Jpeg allows you to keep a good quality image while reducing the dimension of the file on the disk. To optimize the file you can reduce the image even more .
- After saving the image, to
close it, click in the upper left
 and then click on
Close
 . To close it, is also possible to push
x in the upper right hand corner of the screen.
- To
reopen the last closed files click high on the left
 and then choose one of the last files of the right list.
- Once an image is saved, click high on the left
 to
come back to the previously saved one and then click on
Revert
 .
.
- Selecting
 , then
Properties
 allows you to see the properties of the image: name, saving path, dimensions and resolution (in DPI: Dot Per Inch). The properties can also be visualized by going to Home, Image, then
Properties

Print Images
To print an image click on
 and then click on
Printer
 :
:
- Printing Preview
 : You can see a preview of the image and modify it before printing.
- Immediate printing
 : You can send images directly to the predefined printer, without modifying them.
- Printer Setup
 : You can select the printer, the number of copies and other options before printing the image;
Contextual Menu
Right click the image you are working on, so you can go to the contextual menu. (See figure below) :
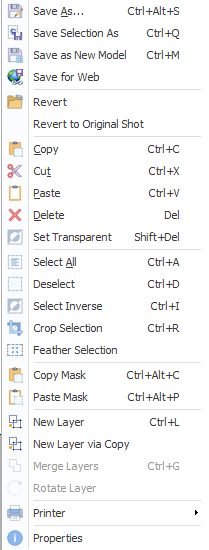
With this contextual menu you can perform various operations in a quicker manner:
- To save an image (to save the selection only, as a new file, for web)
- To perform operations: copy/cut, paste, cancel
- To select the whole image, to deselected an already selected area, to select the opposite of the selected area or to cut the selected area.
- To create or combine layers.
- To Print.
- To visualize the image properties.